Contouring dry skin can feel risky: the wrong product or technique will amplify flakes, emphasize fine lines, and leave your face looking patchy. The good news is that with thoughtful prep, the right formulas, and careful application you can sculpt your features without highlighting texture.
Below are practical, step-by-step methods trusted by professionals and suited for everyday wear — from skin prep to finishing sprays — plus product-focused suggestions to make contouring on dry skin look smooth and natural. For a curated selection of contour and finishing options, visit Perfect Contour Cosmetics.
Understand what makes texture show
Texture becomes visible when matte powders settle into fine lines, and when dry patches lift pigments away from the skin. The goal for dry skin is to keep products slightly emollient and applied in thin, buildable layers so they sit with the skin instead of on top of it. Target placement should be precise — under the cheekbone, jawline, and sides of the nose — while avoiding broad, heavy strokes across crepey areas.
Prep: hydrate, exfoliate gently, and prime
Start with a mild chemical or very gentle physical exfoliation (once or twice weekly) to remove flaky buildup. Follow with a lightweight, fast-absorbing moisturizer and give it time to sink in. If your skin needs an extra boost before makeup, a mist or primer that locks in moisture helps contour products blend without clinging. Look for finishing and primer options designed to add hydration, such as Hydrating Setting Sprays, which can be used lightly under or over makeup to maintain a dewy surface.
Choose formulas that flatter dry skin
Creamy, emollient products are your best friend. They meld into skin and won’t emphasize lines the way powders can. Use products formulated to glide and blend — think cream contour sticks or soft cream palettes. For a smooth, blendable option that layers easily, try Cream Contour Sticks. They allow you to apply a small amount, warm it with your fingers, and buff until natural-looking.
Application techniques that minimize texture
Technique often matters more than product. Key tips:
- Work in thin layers. Build pigment gradually instead of applying one heavy pass.
- Warm product on the back of your hand or with a finger before placement so it spreads evenly.
- Use a damp makeup sponge or a dense, soft brush to press and stipple product into the skin rather than dragging, which can lift flakes.
For targeted sculpting while reducing tugging, a sculpting brush with soft fibers helps distribute product and buff edges for a skin-like finish — a tool like the ICON Lymphatic Contour Brush for Face is designed to sculpt while being gentle on texture.
Tools and brush choices
Choose tools that allow pressing and buffing. Dense rounded brushes and damp sponges replicate the warmth of fingertips but offer more control and blendability. If you’re building a go-to kit, starting sets with soft, multipurpose brushes are efficient and gentle; consider a reliable beginner kit like the Beginner Contour Brush Sets to cover sculpting, blending, and precision work.
Highlighting and finishing for dry skin
For dry skin, cream or liquid highlights integrate into the base and avoid sitting in texture. Use a small amount on the high points (top of cheekbones, brow bone, cupid’s bow) and tap to blend. Cream formulations give a soft, natural radiance that doesn’t exaggerate pores — explore options like Cream Face Highlighters to maintain luminosity without glittery flakes. Reserve powder highlighters for zones that remain smooth, and apply them lightly with a fluffy brush.
Set strategically without drying out the face
Powder can be useful but should be applied sparingly. Instead of dusting powder over the whole face, set only the zones that need longevity (often the T-zone) and use minimal product elsewhere. A light mist of a hydrating or balancing spray finishes makeup and reduces powdery appearance. If you need extended wear without compromising moisture, try a formula tailored to hold makeup while preserving dewiness — such as Long Lasting Setting Sprays — and apply from arm’s length in short bursts.
Common product combinations that work
Pairing a creamy contour with an equally emollient highlight creates dimension without texture conflict. Apply cream contour, diffuse edges with a damp sponge, and add a cream highlight on top. If you need a bit more hold, press a micro-fine translucent powder only where necessary, then rehydrate the surface with a light mist. For beginners, a compact starter set that includes contour and highlight in cream formulas simplifies choices — consider a Contour and Highlight Starter Sets to practice consistent pairings.
Quick checklist before you start
- Exfoliate dry patches gently (1–2× weekly).
- Apply moisturizer and let it absorb fully.
- Choose cream/liquid contour and highlight formulas.
- Warm product, apply thinly, and build slowly.
- Use damp sponge or soft, dense brush to press and blend.
- Set only where needed; finish with a hydrating mist.
FAQ
Q: Can I contour if I have flaky, dehydrated skin?
A: Yes — but first address flakes with gentle exfoliation and moisture. Use cream textures and thin layers; avoid powders until the skin surface is even.
Q: Are sticks or palettes better for dry skin?
A: Cream sticks are portable and warm easily on the skin for seamless blending. Cream palettes work well for multiple shades and mixing; choose what matches your routine and texture needs.
Q: How do I avoid emphasizing fine lines when highlighting?
A: Use small amounts of cream or liquid highlighters and tap to blend. Avoid thick, shimmery powders in crepey areas; instead, choose subtle cream finishes that reflect light softly.
Q: What’s the best way to set makeup without drying it out?
A: Minimize all-over powder. Set problem areas sparingly and finish with a light mist that offers hydration or adhesion — this keeps contour intact and skin looking fresh.
Q: I’m new to contouring — any recommendations for where to start?
A: Start with a simple cream contour and cream highlight, a forgiving brush set, and practice thin, blended layers. Look for beginner-focused kits to remove guesswork.
Conclusion
Contouring dry skin is entirely achievable when you prioritize skin prep, choose emollient formulas, and apply with pressing and blending techniques rather than heavy powdering or sweeping motions. Build color gradually, target placement, and finish with a hydrating mist to keep the look soft and skin-like. If you want an easy entry point, explore curated options such as Contour and Highlight Starter Sets to practice the steps above with compatible products.
Products Featured in This Article
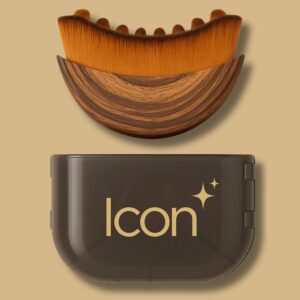
ICON Lymphatic Contour Brush for Fa…
Product description Spa-Inspired Contouring at Home Luxury Facial Massage, Made Simple Elevate your ritual with the…