How to Create a Natural Sculpted Look for Mature Skin
As skin matures, texture, loss of volume, and pigment changes make traditional heavy contouring look harsh. The goal for mature skin is subtle sculpting that restores dimension while keeping the finish soft and natural.
This guide walks through practical steps—prep, product choices, placement, and tools—so you can achieve a flattering, age-appropriate sculpted look that lasts without emphasizing fine lines or pores.
Understand mature skin needs
Mature skin benefits from hydration, light-reflecting products used sparingly, and contour shades that are only one or two tones darker than your base. Heavy matte layers and dense powders can sink into lines; instead, prioritize products and techniques that lift and blur.
For those who prefer a skin-care-infused foundation that reads lightweight and dewy, consider a product like Covergirl Simply Ageless Skin Perfector—formulas like this help create a forgiving base without masking natural texture.
Prep and prime: hydration first
Start with a hydrating moisturizer targeted to your skin type; allow it to sink in. A lightweight primer or moisturizing face mist adds slip so products blend without tugging. On drier or crepey areas, skip heavy powders and focus on creams and liquids.
Finish prep with a hydrating mist to plump surface lines and set a dewy tone before makeup application—look for options in the Hydrating Setting Sprays category to boost moisture and product adhesion.
Choose the right base
Use a light-to-medium coverage tinted moisturizer or serum foundation that evens tone without filling lines. Sheer, skin-like coverage lets you control contrast: less contrast equals softer, more flattering sculpting.
If you want a multitasking option that hydrates while evening tone, try something like the bareMinerals Complexion Rescue Tinted Moisturizer. Apply sparingly where needed—focus on centers of the face and blend outward.
Contour with cream for a natural effect
Cream formulas hug skin better than powders and can be sheered out for subtle shadow. Pick a cream contour that’s cool or neutral and only one shade darker than your base to create believable depth rather than stark lines.
For a user-friendly selection, explore Cream Contour Sticks. Apply thinly beneath the cheekbone (from the ear toward the mouth but stopping mid-cheek), at the temples, and lightly along the jawline to visually lift.
Highlight strategically—less is more
On mature skin, highlighter should mimic fresh skin rather than glitter. Focus on cream or liquid formulas with a soft, luminous finish. Place tiny amounts on the tops of the cheekbones, the inner corners of the eyes, and the cupid’s bow—avoid heavy shimmer on textured areas like deep creases.
Choose cream-based options to blend seamlessly; look at the Cream Face Highlighters for products that meld with skin and provide a gentle glow that doesn’t exaggerate texture.
Blending tools and techniques
Use soft, dense brushes or a damp sponge for creams and liquids. Short, stippling motions and soft downward blends help avoid lifting the skin. Avoid long sweeping strokes that can drag or stretch delicate areas.
If you’re building a basic tool kit, a curated brush set makes it simple—see options in the Beginner Contour Brush Sets. Choose a small tapered brush for cheek hollows, a flat synthetic for cream placement, and a fluffy brush for diffusing edges.
Set and finish without drying
Set strategically: apply a light dusting of finely milled powder only where oil accumulates (T-zone), leaving cheek and eye areas mostly untouched to preserve luminosity. To meld layers and reduce powdery finish, finish with a setting spray.
For longer wear that still accommodates skin’s natural radiance, consider products from Long Lasting Setting Sprays. A couple of spritzes at arm’s length locks products in and minimizes settling into lines.
Organize and care for your products
Keeping creams and brushes accessible and clean helps maintain product hygiene and longevity—especially important for mature skin where irritation matters. Airtight, organized storage prevents contamination and keeps your routine efficient.
A practical storage piece like the Acrylic Makeup Organizer with 19 Drawers helps separate creams, sticks, and tools so you can grab what you need quickly and reduce the temptation to mix dirty brushes into products.
Makeup placement map for a natural sculpt
- Cheeks: apply contour (cream) under cheekbone, stop mid-cheek; blend upward slightly to lift.
- Temples: add a touch of contour to the temple hairline to frame and lift.
- Jawline: lightly define under the jaw to reduce soft jowls; avoid heavy lines at the chin.
- Nose: if contouring the nose, use a very light hand and thin lines—blend well to avoid sharpening.
- Highlight: tiny touches on high points only (cheek tops, brow bone, inner eye).
Checklist: quick routine
- Cleanse and moisturize thoroughly.
- Apply a light-tint base where needed.
- Map and apply thin cream contour lines; blend with stippling motions.
- Add minimal cream highlight to high planes.
- Softly blend edges; set sparingly with fine powder if needed.
- Finish with a hydrating or long-lasting setting mist.
FAQ
Q: Should I use powder or cream products?
A: Creams and liquids are generally better for mature skin—sheer, blendable, and less likely to settle into lines. Use powder only where oiliness demands it.
Q: How dark should my contour shade be?
A: One to two shades darker than your base, neutral to slightly cool undertone. Too-dark shades create a stark, unnatural contrast.
Q: Where should I avoid highlighter?
A: Avoid placing shimmer directly over deep lines, crepey areas, or textured spots; instead highlight nearby high planes to reflect light away from texture.
Q: Can I use the same routine for daytime and evening?
A: Yes—keep daytime softer with sheer layers and minimal powder; intensify slightly for evening with deeper contour and a touch more highlight, but maintain blending discipline.
Q: How do I prevent makeup from settling into fine lines?
A: Hydrate skin well, use thin layers, choose lightweight formulas, blend thoroughly, and finish with a hydrating setting spray rather than heavy powdering.
Conclusion: practical takeaway
For mature skin, sculpting is about restoration, not reinvention. Use luminous, lightweight creams and gentle shades; focus on lift and soft transitions. Prep well, blend patiently, and finish with a setting mist to achieve a natural, sculpted look that enhances rather than hides your skin.
Products Featured in This Article

Acrylic Makeup Organizer with 19 Dr…
From the brand YFXCVSL is committed to the research and development of comfortable products suitable for…
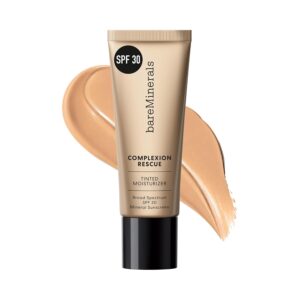
bareMinerals Complexion Rescue Tint…
Product description Product Dimensions : 3.7 x 3.7 x 13.3 inches; 1.18 ounces UPC…

Covergirl Simply Ageless Skin Perfe…
The Covergirl Simply Ageless Skin Perfector Essence Foundation is a vegan skincare makeup hybrid formulated with…