How to Prep Your Skin Before Applying Contour Makeup
Contouring enhances natural bone structure, hides shadows, and brings facial features into balance—but it always starts with skin that’s properly prepped. A thoughtful routine ensures contour products blend smoothly, look natural, and last through the day.
Below is a practical, step-by-step guide to prepping your skin for contour makeup, with product- and tool-focused suggestions so your contour looks seamless every time.
1. Start with a clean, gentle cleanse
Remove dirt, oil, and previous makeup with a gentle cleanser tailored to your skin type. Cleansing prepares the skin surface so contour and highlight products adhere evenly. For double-cleansing nights or heavy makeup days, follow a balm or oil cleanser with a water-based cleanser to avoid residue that can pilled product later.
2. Exfoliate once or twice weekly for a smooth canvas
Regular exfoliation keeps skin texture refined so cream and powder contours glide without catching on dry patches. Use a chemical exfoliant (AHA/BHA) or a gentle physical scrub depending on sensitivity—only 1–2 times per week for most skin types. Skip exfoliation the day of a major event if your skin is reactive.
3. Hydrate based on your skin type
Well-hydrated skin prevents cream contour from looking patchy and powder contour from emphasizing texture. Use a lightweight gel or oil-free moisturizer for oily skin and a richer cream for dry skin. For a quick midday refresh or to create a slightly dewy base before cream products, a light mist can help—consider finishing steps tailored to hydration needs with a hydrating setting spray after makeup to lock moisture in place.
4. Prime strategically for formula and lasting power
Priming fills fine lines and blurs pores for a smoother contour application. Choose a primer that addresses your concerns: pore-filling silicone primers for texture, hydrating primers for dry skin, and mattifying primers for oily zones. If you expect long wear (events, photos), plan to finish with a product designed for longevity; pairing the right primer with a long lasting setting spray will help contour stay put without looking stiff.
5. Choose the right contour formula and shades
Select a contour texture that matches your routine and skill level. Powder contours work well over matte bases and are forgiving for beginners; creams and sticks blend beautifully into hydrated skin and offer a more sculpted, natural finish when blended well. If you’re starting out, look into contour and highlight starter sets that pair user-friendly shades and instructions.
For more structured palettes tailored to less experienced users, consider a contour palette for beginners. Palettes often include multiple depths so you can mix and match to find the perfect tone without guessing.
6. Tools and organization: what to use and how to store them
Quality tools make contouring cleaner and easier. Use a dense angled brush for powder contour, a slightly tapered brush or sponge for cream blending, and a small fluffy brush to soften edges. If you’re building a kit, a beginner contour brush set gives you the basics in one purchase.
Keep brushes clean and stored upright to maintain shape and hygiene. Proper storage reduces bacteria and keeps bristles from splaying—consider tidy storage options to protect your investment and speed up your routine.
7. Highlight prep: where and when to plan it
Decide whether you’ll highlight before or after contour based on your products: cream highlighters blend seamlessly with cream contours; powders sit better on top of set cream products. If you favor stick highlighters for quick application and portability, a highlighter stick can be applied to high points and blended for a natural glow.
When prepping skin specifically for highlight, add a touch of lightweight serum or primer to areas you want luminous finish on—this prevents dry patches from dulling the sheen.
8. Final prep and blending tips before product application
Before applying contour, press a thin layer of foundation or tinted moisturizer into the skin—this evens complexion and creates the base for contour. For a multi-tasking tinted option that hydrates and provides light coverage, try a product like the bareMinerals Complexion Rescue Tinted Moisturizer.
Tip: Apply contour in light layers, blending as you go. It’s easier to deepen a subtle contour than to remove excess product.
Checklist: Quick prep steps before contouring
- Cleanse thoroughly and pat skin dry.
- Exfoliate 1–2× weekly; avoid same-day over-exfoliation.
- Moisturize to match your skin type.
- Prime targeted zones (pores, T-zone, or dry areas).
- Choose contour formula (powder, cream, stick) and shade.
- Gather brushes/sponges—clean and ready.
- Apply thin base coverage, then contour in light layers.
- Set with appropriate setting spray based on finish desired.
FAQ
- Do I contour before or after foundation? Apply a thin, even base first (tinted moisturizer or foundation) so contour blends into the skin. Cream contours can be worked into damp bases for a seamless finish.
- Can I contour oily skin? Yes—use lighter cream or powder formulas, mattifying primer in problem zones, and finish with a setting spray designed for longer wear to avoid slipping.
- What brushes are best for beginners? Start with a dense angled contour brush for powder and a small tapered brush or beauty sponge for cream blending. A beginner set covers these essentials.
- How do I prevent contour from looking streaky? Prep skin with moisturizer, prime where needed, and blend in thin layers using a brush or sponge with gentle, circular motions.
- Should I set cream contour with powder? Lightly set cream contour with a matching powder to reduce transfer and extend wear, especially in humid climates or long days.
Product and routine suggestions for beginners
If you prefer a simple, quick routine, try an easy-to-blend stick formula that’s forgiving on the go—explore easy blend contour sticks for quick sculpting without complicated technique. For those who want a compact system, a contour and highlight starter set combines coordinated shades and guidance to build confidence.
Conclusion
Prepping skin properly—cleanse, exfoliate thoughtfully, hydrate, and prime—gives you the best foundation for natural, blendable contour. Use suitable tools and products matched to your skin and practice light layering for controlled sculpting. With these steps, your contour will look polished and last throughout the day.
Products Featured in This Article
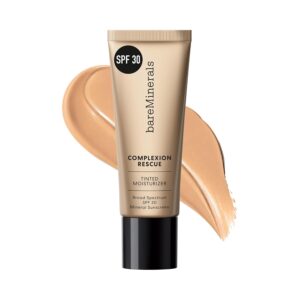
bareMinerals Complexion Rescue Tint…
Product description Product Dimensions : 3.7 x 3.7 x 13.3 inches; 1.18 ounces UPC…